When life gives you lemons…

… make a lemon and blueberry drizzle cake.


Or should we say lemon and blueberry yoghurt drizzle cake… but that would be too long!

Makes one loaf.

Ingredients

  • 75ml veg oil
  • 125g natural yoghurt (we used 0% but you can use full fat)
  • 150g caster sugar
  • 2 medium eggs
  • 1 tsp vanilla extract
  • 2 lemons
  • 210g plain flour
  • 1.5 tsp baking powder
  • a pinch of salt
  • 200g blueberries (frozen ones work too)
  • icing sugar

Equipment

  • 900g/2lb Loaf Tin
  • Greaseproof paper
  • Scale
  • 3 x bowls
  • Whisk
  • Fine grater
  • Spatula
  • Spoon

Method

Preheat the oven to 180C, and line your cake tin with the grease proof paper.

In one of the bowls weigh the wet ingredients and the sugar and whisk. Using the grater add the zest of the two lemons.

In the other bowl weigh all the dry ingredients and the blueberries and stir. Add the dry ingredients to the wet and fold gently. Try not to overmix the batter at this point. Once they are combined you can pour the batter into the tin.

Bake for 50-60 min or until a toothpick inserted comes out clean. Leave to cool before removing from the tin.

Mix around 60g of icing sugar with the juice of half the lemon to create the drizzle. Using a spoon drizzle the icing over the top of the cooled loaf and serve.

Happy Baking!

~Dominique~

A Beginners Guide to Baking – Common mistakes

We’ve all done it… spent hours in the kitchen lovingly preparing a cake, but the second you take it out the oven it sinks… what went wrong? Here are a few things to keep in mind to make your next bake a showstopper.

  • First and foremost, read the recipe all the way through before starting. There might be things you need to get done in advance or in a certain order.
  • Be organised. Get all your ingredients and equipment out and follow the instructions.
  • Don’t try winging it on the first go. Make the recipe according to the instructions. You can always play around with the recipe next time. Baking is a science and things are done a certain way for a reason.
  • Ensure all your ingredients are at room temperature.
  • One of the most important things in baking is weights. Baking is all about precision, if the recipe asks for 100g of flour, make sure you have 100g of flour. Too much or too little of something will change the outcome completely.
  • Remember to coat fruit in flour before adding them to the batter as this will prevent them from sinking.
  • It goes without saying that you should always try and use the best quality ingredients that you can afford. Not everything has to be top of the line, like flour and sugar, but things like chocolate should be good quality to get the best results.
  • On the same note, use fresh fruit and vegetables that are in season. You’ll notice the difference in taste.
  • Try not to over, or under, mix your ingredients. Usually folding in the dry ingredients with the creamed sugar is enough. That’s why it’s so important to read the recipe properly.
  • When whisking egg whites use a clean and dry bowl. A drop of water of some oil left on the bottom of the bowl will prevent the egg whites whisking properly.
  • Take the time to line your tins/trays properly. Whether you’re using parchment paper or good old butter and flour, make sure you do a good job. There’s nothing worse than a beautiful cake stuck in the tin.
  • Chill cookie dough before cutting them into shapes. This will solidify the butter and make them easier to cut and help them keep their shape when baking.
  • Don’t twist the cutter when making things like cookies or scones. This stops them from growing . Firmly press the cutter down and lift.
  • Once you’ve poured the cake batter into the cake tin, take the time to smooth the batter to make a flat top. This is so your take doesn’t form a dome on the top and cooks evenly.
  • Don’t overfill the cake tin. Leave room for the cake to rise. You don’t want your house smelling of burnt cake batter.
  • Understand your oven.
  • Remember to test your cake before removing it from the oven. A toothpick pushed through the middle of the cake should do the trick. When you remove the toothpick it shouldn’t have batter stuck to it.
  • Resist the urge to cut into the cake before it’s had time to cool. I know it looks delicious and the house smells like grandma’s but be patient. Not only will you squash the cake but you will loose some of that wonderful fluffiness


Happy Baking!

~Dominique ~

Beetroot Chocolate Cake

If there are two flavours from my childhood that elicit fond memories it’s chocolate and beetroot. This cake is moist, sweet and deliciously chocolaty. Don’t let the beetroot put you off, you can’t taste it, it just makes the cake sweet and moist.

Beetroot Chocolate Cake

Beetroot Chocolate Cake

Makes one 20cm round cake.

Ingredients

  • 170g plain flour
  • 10g baking powder
  • 75g cocoa powder
  • 225g caster sugar
  • 3 eggs
  • 225g cooked beetroot (you can either buy cooked beetroot or peel and boil raw beetroot and cook in boiling water for 30-40 min and cooled)
  • 200ml vegetable oil

Equipment

Cake Tin
Grease proof paper

Scale
Bowl
Sieve
Blender
Spatula

Method

Preheat the oven to 180C, and line your cake tin with the grease proof paper.

Weigh and sieve all the dry ingredients into a bowl.

Put the rest of the ingredients into a blender and mix until smooth.

Fold the beetroot into the dry ingredients pour into the prepared tins and bake for about 40 min or until an inserted skewer comes out clean.

Remove from the oven and leave to cool before turning out the tin and serving.

This cake is delicious on its own or can be covered in chocolate ganache or served with vanilla ice cream.

Happy Baking!

~Dominique~

Chocolate Ganache

Sometimes things don’t have to be complicated to be delicious. chocolate ganache is perfect to use in so many different ways, use it to fill or top a cake, decorate a tart, use it to fill macarons or even make chocolate truffles.

Dark Chocolate Ganache

Makes enough to cover a 20cm cake or 24 cupcakes

Ingredients

  • 250g good quality dark chocolate
  • 135g double cream

Equipment

Scale
Saucepan
Bowl
Spatula

Method

Break the chocolate into small pieces and leave in a bowl while you warm the cream. Gently warm the double cream in a saucepan until it just starts to bubble. Add the cream to the chocolate and stir until the chocolate has melted.

Happy Baking!

~Dominique~

Sables

A sable or galette Bretonne is a kind of French shortbread originating in Normandy, these light buttery biscuit get their unique flavour & texture from the addition of an egg  to the dough. Traditionally they are round with a fluted edge, with a criss-cross pattern drawn into egg wash. They are my absolute favourite and I could easily eat half a dozen while drinking a cup of tea.

IMG_0048

Sables

Makes: 14-16, depends on the size of your cutter.

Ingredients

  • 140g unsalted butter at room temperature
  • 100g caster sugar
  • 2 eggs (1 for the dough and 1 for the egg wash)
  • 1tsp vanilla extract
  • 260g plain flour1/2tsp baking powder
  • 1/4tsp salt

Equipment

Scale
Bowl
Electic mixer
Cling film
Rolling pin
Baking tray
Parchment paper
Cookie cutter
Pastry brush

Method
Using a mixer beat the butter and sugar for about 3 minutes until light. Add 1 egg and the vanilla and beat until combined. Add the flour, baking powder and salt and mix until just combined, you don’t want to over mix the dough, so don’t mix for too long.  Flour your work surface and tip the dough out of the bowl and knead a few times. Wrap the dough in cling film and refrigerate for at least an hour.

Line a baking tray with parchment paper. Remove from the fridge, flour your work surface again and roll the dough out to about 1/4 of an inch thick. Using the cookie cutter, cut out your shape and place on the prepared baking tray. Gather up any scraps, re-roll and cut so none is wasted. Place in the fridge for another 15 minutes so the butter can harden again.

Preheat the oven to 180º fan. Lightly whisk the other egg. Remove the dough from the fridge, brush with the egg wash and using a toothpick make a criss-cross pattern along the tops of the biscuits. Bake for 10-15 minutes depending on your oven. They should be golden and slightly crisp around the edges. Cool before eating.

Keep in an airtight container and eat within a week. You can even divide the dough in half and freeze before baking. Apparently you can also freeze them once baked, we haven’t tried this yet, but as soon as we do we’ll update the recipe.

Adapted from Joy of Baking.

Happy Baking!
~Dominique~

A Beginners Guide to Baking – Essential Equipment

baking_basics
freefoodphotos.com

When it comes to baking, the equipment you need can be endless, and this can seem daunting. So what do you really need to invest in?

Scales The most important thing to get right in baking is weights. So the most important piece of equipment you need, in my opinion, is a good scale. Baking is about precision, you can’t just throw some ingredients together and wish for the best.

Measuring spoons and jugs Hand in hand with this goes measuring jugs and spoons. Measuring jugs are ideal for measuring liquids and they double as a mixing bowl… bonus! They don’t need to be fancy anyway, as long as they measure accurately.

Tins and trays When it comes to the tins and trays there is a lot out there, but what do you really need? If you had to go out there now and buy every tin that exists, you would spend an absolute fortune. What I would suggest is buying a few and use your imagination until you can afford to add to your collection. Who said a Victoria sponge has to be round anyway? In my opinion the most important are a 20cm round spring form tin (for cakes, cheesecakes, tarts, etc), a 2lb loaf tin (for cakes and breads), a rectangular tin (this can be used for things like brownies but double up as a baking tray) and a 12 hole muffin tray.

Whisk I don’t know what I would do without my whisk. I have a little one that cost me £2 and I use for everything… pancakes, custard, sauces, cream cheese frosting and fairy cakes.

Bowls I know it seems like an obvious thing to have bowls, but to make your life a little easier try find some that have no edge or grooves so the ingredients don’t get stuck in there and you don’t waste as much.

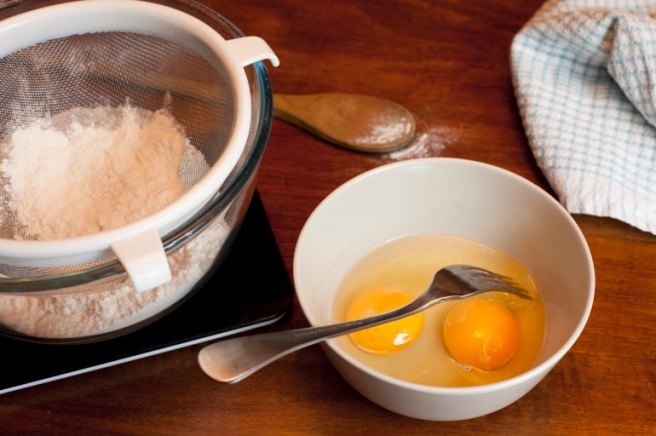
Sieve Nothing fancy needed here either. But this is an essential as not only does it air the flour it also catches anything that might be in the dry ingredients.

Spatula A silicone spatula is one of those things you can’t do without, use it for folding in and mixing ingredients and for scraping the sides of the bowls to minimize wastage.

Rolling pin This doesn’t have to be a big expensive one, I use a little Silicone one and I manage just fine. Wood is fine too and don’t worry about gadgets unless you’re planning on making your own pasta.

Pastry brush You can get a pastry bush from any local supermarket that will cost you less than £2. As long as it’s good quality and the bristles won’t loosen and end up in the cake.

Cutters Round, square, heart shaped, gingerbread men… whatever takes your fancy, but start off with one set, you can get a set of 6 or so round ones in most supermarkets, to make cookies and scones. Once you start being more adventurous your collection can grow with you.

Zester More specifically a fine zester, whichever you feel more comfortable using as long as it gets the job done and doesn’t take half your finger with it.

Piping bags and nozzles You can either spend a little more money and but a fabric piping bag and this usually comes with some sort of nozzle. But what I would suggest is getting a few plastic piping bags and a 15mm round nozzle. This will work for doing straight forward things like cupcakes but also be perfect later on for macarons for example.

Happy Baking!

~Dominique ~

Butter Bean Hummus

Last October I went on holiday to Malta. One sunny afternoon in a little café in a side street of Valletta, I had the most amazing bread spread thick with a white bean hummus. I was in love! So here’s my version, obviously no where near as good as the one from Angelica’s. But maybe that has to do with the bread and wine that went with it.

~Dominique ~

Ingredients

  • One can butter beans (cannellini beans work too), drained and skins removed if they are peeling
  • 2 cloves Garlic
  • 35g tahini
  • 2 teaspoons ground cumin
  • 1 teaspoons ground coriander
  • 1/2 teaspoon smoked paprika
  • 30ml olive oil
  • 45ml lemon juice
  • Salt and pepper

Method

Process the beans in a food processor until they form a paste. Add the garlic and pulse 2 to 3 times to incorporate. Add the tahini, cumin, coriander and paprika and blend until it starts to become smooth his will take about 2 minutes. With the processor still running, pour in the olive oil, add the lemon juice. Blend until well incorporated. At this point you may want to add water if the mixture is too thick. Start with one tablespoon, adding more if needed. Season to taste.

Best enjoyed once chilled with crudites, crisps or pita bread. Also use as an alternative to butter/mayo in a sandwich.

Almond Biscuits

My parents are keen cooks and at home there was always a tin box full of homemade biscuits.  We called it the magic box since it felt like it always has some sort of delicious baked treats magically appearing inside.

One of those treats were some chewy almond biscuits. One of my favorites, it always reminds me of Christmas time.

So I’ve decided to share this recipe with you. They are very easy to make, a great recipe to enjoy making with children. They keep well in a tin box.

~Claire~

Almond biscuits

Almond Biscuits

Makes: 12

Ingredients:

  • 200g Ground Almond
  • 100g Caster Sugar
  • 1 Egg
  • Flaked almonds/Icing sugar

Method

Preheat the oven to 180°C.

Place ground almond,  caster sugar and the egg white in a bowl and mix until it all comes together. Divide the mixture into 12 pieces. Shape each one into a log and shape into a half moon.

Bake for 10 – 15 min

You can finish them in 2 different ways. My absolute favourite is coating them in the egg yolk and then sprinkling with flaked almonds before baking. The other option is not coating them but to roll in icing sugar once they’ve come out of the oven.

Adapted from Suzanne Roth, Les Petits Gateaux d’Alsace